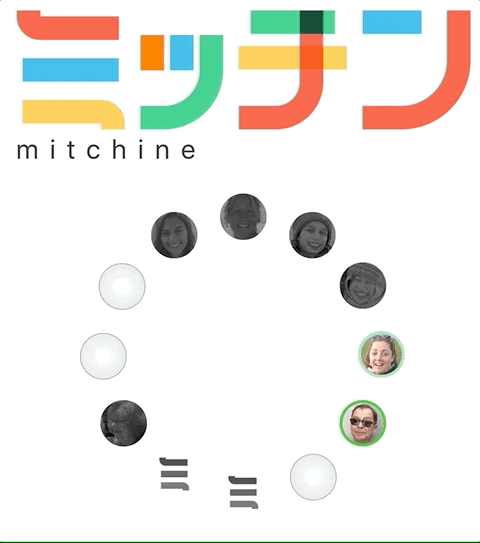
ミッチン Part 1
 This is one of the designs I’ve decided not to continue developing
A few years ago I worked on a family Christmas present that I called “Mitchine.” There is a very long post about it if you are not familiar and interested. It was essentially an “IoT” (whatever that means these days!) device that allowed my family to interact in a small way over distance.
I spent quite a few nights near tears debugging various hardware issues but the project was one of the more fulfilling of my life so far…. And so a year or so later I decided to start a new, improved, better version of the same concept.
Fast forward three+ years and I’m still not anywhere even close to being finished with the project.
I’ve invested a huge number of time into the project but I’m at a point where I’m not certain I’ll ever finish. I wanted to document somewhere what I’ve done up to this point so that I have something I can look back on, whether I finish the project or not. This post is intended to document the path to where I am now.
Basic idea of how I want the new device to work
This is what I want to make (but with many more details in the scope section below:
- Each device has a range sensor, able to detect movement directly in front of it between 1 or so meters away or less
- The range is sent to a central system which then updates all other devices to show that a family member is in front of their device
- The family member would be represented by a light on a display
- The position of the light on the device display as well and maybe the color of the light would be used to identify which family member was near their device
- The brightness of the light or possibly the color would change to indicate how near the person was to the device (e.g. if they had their hand directly in front of it it would be very bright, if they were standing a few feet away it would be more dim)
- When two family members were standing in front of their device the device would make a sound using a physical / visible mechanism to draw attention to the event
- If three people were in front of their device at the same time, a different sound would happen, or four, etc.
- The device would have a do-not-disturb mode that could be set via the web application
- All of this would happen near real time, with my requirement being that a delay between somebody moving in front of the device and all other devices being updated would be < 5 seconds, with a goal of ~1 second.
That it’s. Really it’s just a very simple way to let other people in the family know when there is a remote interaction between them.
Scope
Coming out of the last project and going into this one, I knew I wanted my next project to be
- more robust
- Better fit / finish / aesthetic
- improved interactions and scalability
There is actually a lot of specific requirements.
More robust
AWS infrastructure
One of the big problems with the first Mitchine is that, well, it no longer works. I had hosted my own MQTT server and over the years as I’ve move servers around (AWS EC2 to Digital Ocean Droplets to “serverless” architectures) MQTT went away and the boxes stopped working. I could (and intend sometime to) get the infrastructure up and running again but quite honestly I’m sort of “over” dealing with servers these days.
So, I decided fairly early on to go “all in” on AWS as a cloud / infrastructure platform for the entire project. At the core this means AWS IoT, but everything else I need to do (e.g. authentication) I want to run through AWS as well (e.g. Cognito).
✅ Still in scope
Secure
The first device was secure through obscurity. Anybody in the world who knew the MQTT server address could freely send / receive messages to the devices. Of course this doesn’t really matter, there is very little chance of somebody taking the time to “hack” this system and even if they did the harm that could be done is minimal. At the same time, it bothered me, and by making the backend infrastructure so proof of concept-ish it would have made it really difficult to (for example) make a second set of boxes for my partner’s family. So for the new version of the project I wanted to use the tools available in AWS to make something that could in theory be productized if I wanted to without having to start from scratch.
✅ Still in scope
Use a better “operating system” for firmware, something more robust and feature rich than the Arduino “platform” with option of over the air firmware updates
With the first project I used the Arduino IDE to write / deploy firmware. Truly most of what I did was cobble together various examples and code from stack overflow and tweak things until it worked.
Early on for this project decided to use [Mongoose OS](Mongoose OS - an IoT Operating System). It dovetails well with my AWS requirement as you can provision AWS access when you flash firmware, has pub/sub message support for writing cleaner code (I’m sure there is a giant event loop somewhere, but it’s not something you see), has built in support for OTA firmware update, has a basic C JSON parsing library, etc.
✅ Still in scope
Better onboarding
The onboarding process for the device is never going to be AMAZING without investing a ton of time, but I do want a more robust setup process with a captive browser system (e.g. connect to device SSID and automatically bring the user to the setup page regardless if you’re on a desktop, Android, or iOS device).
✅ Still in scope
Ability to configure most device features via a browser
The first device had a very simple setup / configuration interface that was hosted on the device itself. I wanted the new version to have a configuration that was available via the web for easier access.
✅ Still in scope
Better fit / finish / aesthetic
Easier to manufacture
With limited access to tools, I’ve decided that it’s absolutely critical that the manufacturing steps to create the final hardware are as idiot-proof as possible. Highly repeatable.
✅ / ❌ Still in scope, but still unsolved
Industrial look using wood, concrete, and mild steel welding
I decided I wanted the new design to look industrial, and I decided that I wanted to use a range of different skills I poses to create the final hardware. When I first started designing the project I had easier access to welding equipment and wood working tools, but no access to a 3D printer. Since the first design iteration, I no longer have access to either wood working tools or welding equipment, but I do have a 3D printer. Of course where there is a will there is a way, but I’ve moved towards molding and casting, and away from wood working and welding for now.
 this was the first concept after a lot of design and prototyping, but in the end I decided it was too difficult to manufacture
❌ De-scoped-ish
Interactions
Physical sound making device
I like the idea of having a visible physical sound source. E.g. chimes that actually move, or a bell that is actually rung, etc. This would be used as one of the outputs from the device. Something about seeing the thing that is actually making the sound is cool to me (as opposed to something like a speaker which is less interesting).
⁉️ Maybe still I scope, but a real pain
Distance or presence sensor of some sort
I wanted one of the main additions to the project to be a distance or presence sensor. This is the main method of interacting with the new device, instead of a physical touch button.
✅ Still in scope
3D 1:1 near real-time digital analog
I originally planned to take the 3D model I made for prototyping / design work and create an interactive version of the device. I was going to useThreeJS, and in fact I probably spent a good month working towards this. I would say I had a full proof of concept, including my model exported from Blender into a format ThreeJS could deal with, baked / PBR textures, etc.
I’ve moved away from this and am instead going with a much simpler but still functional website. It’s perhaps less technically impressive, but much easier to maintain and leaves the door open for the feature in the future.
✅ / ❌ Simplified requirement
Ability to add new features over time
This is a bit of a crossover with some of the other requirements, but basically I wanted to put more thought into the firmware / hardware so the device itself is more of a simple input and output device so that the actual functionality could be modified over time by changing server side code.
⁉️ Still I scope, probably but a real pain - see note below on balancing AWS costs, responsiveness, and state management
Battery power backup with POJO pins for docking
I have other ideas for projects that require battery power so I had decided to challenge myself on this project and include a LiPo charging circuit and various power saving hardware features so the device could be easily moved around if needed. There was almost no practical reason for this, but it was something I thought would be cool to implement. I actually did a lot of research into this and even have a first circuit revision that includes a LiPo
Random other requirements
- USB-C power - ❌ so expensive!
- Minimize soldering of components - ideally most if not all of the electronics components are on a single PCB
- Easier programming - I don’t care about having a USB driver or whatever on the PCB, but it would be nice to more easily be able to connect to the board for programming
Progress and process
Up to this point this project has been a huge mix of lots of work / thought / time invested and periods of many months where I’ve done nothing. There are so many different technologies and tools and disciplines involved here that I’ve had to learn and relearn different things several times over (several times now I’ve had to reacquaint myself with Blender, Fusion 360, how capacitors and resistors work 😂, etc).
Design
Initial design
My original idea I went into the project was to build something sort of reminiscent of a lantern of some sort. I started working on the project in Blender because I knew I would need to export shaders / materials to ThreeJS for the interactive web component.
 Initial design in blender
I made it surprisingly far with Blender and was fairly happy with the design concept, but after a while I realized I really disliked working with Blender for anything at all dimensionally accurate and I honestly just don’t have the skill to be able to do a great job.
 Final render of model created purely in Blender before switching to Fusion 360
 I made a “model” of the dimensions I had planned to get a feel for how big the thing would be in person - I didn’t want it to be too big
I decided that it would save me a lot of time in the long run to learn Fusion 360 (I hadn’t used it before this point) and absolutely loved parametric modeling with Fusion. I started from scratch and modeled the thing in Fusion.
 Fusion 360 model of the first design of the device
The screenshot gives an idea of the different components, including the cut-away where I intended to route wires through the steel square tubes into the box. I spent quite a bit of time (too much time, but I got excited and focused on too many details like this) making sure to get a lot of details right, e.g. making sure the square mild steel tube had the correct radius for the fillets, etc.
 Advanced measuring technique to estimate fillet radius
I won’t dwell on the details for too long here, but I ended up taking that design and moving it back into Blender so I could texture the thing. This render (which is the same as the one on the top of the blog post) included a lighted box idea that I was experimenting with in place of a sound making device.
FYI, the wooden base you can see here was intended to contain the pogo pins, so that the device could be taken out of the base if you wanted to move it around (for some reason? As mentioned above, this was sort of a stupid requirement).
One of the final renders I did of the first design
I made it far enough with this design that I decided to go ahead and actually have a buddy of mine print one of the parts so I could see what it looked like “in real life”.
 First 3D print done
I’ll talk more about the design and the reason for the bits sticking out of it a bit further down below.
Second design
At some point after doing some prototyping of the manufacturing processes, and after struggling to figure out where / how in this design I was going to fit a physical and visible sound making device, and I also decided after actually trying to make some of this thing that it was going to be way too much of a pain to actually manufacturer.
One problem (and there are quite a few which I’ll talk more about below) to point out is that I didn’t want to have to precisely cut a bunch of wood. This design required cutting ~40-50 pieces of wood perfectly to be the exact same size as the cement sections. As mentioned in the scope breakdown, I really want the project to be as idiot proof as possible, and so I thought that a better option would be to use a templating bit on a router table to cut the wooden pieces.


This design has some beautiful garbage on top for making sound, which was inspired by a “mbira” aka a finger piano. It had fewer difficult construction steps, and as mentioned all of the wood pieces could be cut using a templating bit on a router table removing what would have otherwise been a very annoying and time consuming (especially without tools!) process.
But… I decided before going too much further that the design was still not great, and the manufacturing of the large single cement / concrete piece in the middle was too tough, and at the time I was moving from Japan to the UK via a brief stay in the US and the welding seemed like it would be difficult to pull off. Also, while likely possible, the sound making device on top seemed like it would be clunky, error prone, and not super responsive because of a likely need for gear reduction to get enough torque to actually push the metal bits back with such a small motor / space.
So, I’ve scrapped this design as well.
A minor detail - the table!
Because this gift is for my family, I wanted to have some small details that would be meaningful to my family. For the models on the website I recreated a smaller version of our family table (which is actually an office table). This table, which I think is a Steelcase model of some sort designed for a conference room, has been in the family since I was a baby.
 ”The Child” table
One of the more distinguishing marks on the table is from my dear mother who was ironing on the table and left the iron down for too long and it burned.
 This is the table and original source material for the burn texture on the rendered table
This is the detail you see in these renders

Sadly the table is one of the things I’m saddest about throwing away (for now!).
Third design
Which brings me to now, where to be honest I am sort of back to the drawing board. I will save the next design (if there ever is one!) for part two of this blog post!
ThreeJS
I spent a number of days learning about ThreeJS as I believe it is the right tool (or at least a right tool) for taking my textured model(s) from Blender to make an interactive website. The idea again was to make a website that after logging in showed “your” device in a full screen interactive photorealistic (as possible) web app. The 3D version in the browser would play sounds, lights in the device would react just as they did in the physical device, etc.
I am kicking myself because I made it fairly far with this, I’d say I have a full proof of concept implemented and working, maybe even more than a proof of concept:
- the textured model with baked textures from Blender was working
- ThreeJS was integrated with the rest of the React app
- I had point lights controlled via the React app
Unfortunately although I’m almost positive I took videos / screenshots of this, I can’t find them and I don’t feel like jumping through hoops to get the thing running again locally. What I do have though is one of the first ThreeJS tests where I took a 3D photo using Google Street View and processed it to create a background/skybox/environment for a ThreeJS project:
Fun fact: at the time we were living in Japan and the background is from this walk in Hokkaido over winter.
I took a bunch of photos of various locations in and around our house when I was back in the States with the intention of using these as backgrounds that might change randomly or based on time of day.


(Point of personal interest: my second attempt of a panno after the outdoor photo in the video above was in our apartment in Japan)
As I mentioned I had the Blender exported model with point lights integrated with React and ThreeJS, including baked textures, but it was not as good looking as I had hoped, and there was some minor but annoying issues with certain mobile devices I was testing on (full screen ThreeJS project and supporting swipe actions on the canvas, etc). I decided that realistically to get the polish that I wanted for the project I was going to have to spend a lot of time better understanding material support in ThreeJS, as well as a lot of time with React and ThreeJS for mobile support. To be fair I wouldn’t be shocked if I managed to get this perfect (or to my standards / vision) with another day or two of effort, but I decided for the value / gimmick it might not be worth it. I suspect if I ever finish the project I might come back to this as a “fast follow” as they say in the industry 🙂.
Prototyping manufactoring
Molding concrete and cement
I knew before I started the project that I wanted to use cement, and I knew that to do so would mean creating molds of some sort to make reproducible parts (see: requirement on ease of manufacturing and idiot-proof-ness).
While still living in Japan I had very limited access to mold making materials, but I was excited to do some experimentation and bought some chocolate / cake molds from Daiso.
 インスタント セメント aka instant cement from the Daiki hardware store near our apartment in Japan
 I was interested to see how brittle basic quick set cement was. You can see the molds in the background
 Some sort of fiber additive I wanted to try - I didn’t get around to it until we actually moved to the Japan -> UK -> CA… it’s been a long project
Overall my takeaway from this very early testing was that I wouldn’t be able to just use pure cement, I need to use additives to make a material that isn’t terrible brittle.
Quite honestly I’m now questioning the concrete use at all, and am at least considering other materials like polyurethane plastics, etc.
Creating molds
I ended up buying a 3D printer to help with the project, and along with the original design my buddy Bret printed for me while I was in Japan (the white resin) I created a mold to test the design.
 Creating a simple mold box for the resin mold
 After pouring resin into mold
 I’m not sure how unique this is, but I came up with a way to have through holes in my mold with a one piece mold. Overall it worked fairly well to allow me to make through holes in the final design.
 A relatively successful final piece of the first design. Quite a few bubbles and so quite a few voids, not good enough.
Overall I think this casting technique will work, and I think that using the 3D printer to create molds makes a lot of sense. I’ve spent some time since these photos were taken (which was about a year ago, before moving to the UK) to experiment with different mold designs.
A difficulty is that to cast a perfect part that doesn’t require any manual cutting or a lot of sanding (which is really difficult with fine / small concrete parts I need to design parts that are either tolerant to bad tolerances (e.g. where edges are hidden behind some other part. It’s really easy to underestimate the work required to “only” have to sand one piece of a concrete flat enough that a piece of wood will sit level and flat against it.
This is still a work in progress, and I hope that the next design I come up with will be the final design. In the meantime I’ve been experimenting with simple concrete parts (unrelated to this project) to get a feel for working with different materials.
AWS / the backend
I probably spent the most time thus far learning about all of the various services to build out the backend.
I’ve settled on this set of AWS tools, which is subject to change I suppose, but so far seems at least viable:
- AWS IoT Core for provisioning devices and handling device shadow state
- AWS IoT Events possibly (still evaluating) for event orchestration
- AWS Cognito for handling authentication and authorization to the AWS resources required (e.g. access to AWS IoT events)
- AWS Lambda, Route 53, S3, DynamoDB, API Gateway for the web “stuff”
- AWS Amplify to help wire together some of these services for the web application (more on this below)
IoT and message handling
IoT Core was one of the first picks I made, and I hope that in the long term it helps with the reliability of the project as it doesn’t require me hosting the backbone of the service. It’s essentially a queue of some sort (MQTT?) that has listeners in AWS-land that listen on certain special topics (e.g. /shadow/update) takes action based on the messages sent to these topics. Examples include persist data (this is called the device shadow) and trigger other AWS services like lambda functions.
My original plan was to have each device mirror its device shadow. I even had a working proof of concept. Basically what this did was (straight from the comments in the source code from the PoC linked!):
- Get the groups that this Thing aka device triggering the function is part of
- Get the Things aka devices in that group - basically find all of the devices / Things that need to be updated
- Fetch configuration values from the database that show settings that were set by the users such as the display positions, the times that they want to stop the device from sounding, etc.
- Get the shadow of each Thing in the group
- Update each Thing’s shadow in the group
This design (or architecture) here allows for the backend or middleware to control exactly what is displayed on the device - the device shadow is not updated by anything but the middleware. This allows me to add features or change functionality over time without having to update firmware.
One problem I ended up running into here (and I’m not sure yet if it’s a total blocker or not) is that there is just a lot going on between when a message comes in from a device and the shadows are updated. I found it takes a fair amount of time to made all of the required calls. Additionally, I’m concerned about cost - even if I’m debouncing the distance changing, somebody walking back and forth in front of their device or if the device is placed on a kitchen counter when somebody is cooking, there could be hundreds or even thousands of updates triggered and these cascade / multiple by a factor of 10 or more. I don’t want to start spending $50 bucks a month for the rest of my life (as much as I love my family).
Another problem is the potential for shadow states to be “stuck” - for example if you unplugged a device after it reported a distance reading of 10 centimeters, all devices shadows would show that value, forever, until either the device was plugged back or until I developed a method to “unstick” the readings. Conceptually this is fairly easy, e.g. set a timeout of 10 minutes and if a shadow is set at the same value for one 1 minute then override the value back to zero. But there isn’t a great or obvious (to me) mechanism for doing this with AWS. It would be easier with a traditional server I think with a long running process, but it’s at least a hassle with the shadow and IoT Core mechanism.
There are certain single events that aren’t well represented by the shadow, at least by my thinking. Something like “play a tone” COULD be represented by switching a “SHOULD_PLAY_TONE” boolean value or something in the shadow and then have the device update this after it had played, but that seems overly complicated and has other issues. In my opinion I’d still need the device to listen to a “/sound-events” topic or something that had single one off messages.
So in a lot of ways I’ve been feeling like I am fighting myself by using the device shadow - it’s faster and more straight forward to just directly pick up the messages sent out from a device by the other devices. I’m currently leaning in this direction, even though it means that I need to build most of the display logic into the device itself. Extensibility wise is a much less powerful approach I think plus it greatly reduces overall complexity and the AWS bill. I can still have the device configurations pulled by the device and used to configure display, but I skip the significant overhead of doing this in the backend.
There is also AWS IoT Events - this is another service from AWS that allows you to build rules to respond to different IoT events in certain ways. I’m still evaluating / learning about this service, I have a simple PoC but it’s not working well yet. I’ve found the documentation for this service to be a bit confusing.
AWS Amplify
Amplify is a questionably great service from AWS that orchestrates a lot of different services (mainly Cognito, API Gateway/Lambda, and IoT Pub Sub) and makes it incredibly easy to handle deployments, spin up development environments, and it integrates with React (or many other frameworks) easily - when it works.
In practice this makes it really easy to do everything from setup a domain name with Route 53 to adding a new api endpoint with API Lambda and Lambda to supporting federated identities and social sign in configuration to the most important thing which is supporting subscribing and publishing events to device shadows.
The problem is when something goes wrong, there is a hole lot of stuff that is obfuscated by Amplify and you end up spending hours (or days in my case) opening tickets with AWS trying to figure out why things aren’t working. This very long and very drawn out issue that I commented on quite a bit) is a great example. It took from October 2019 to July of 2020 for this issue which to me seems like an absolutely critical blocking bug to be fixed - this bug in particular made me question the support from AWS for Amplify long term. For now I’m going to stick with it.
This video which is fairly old at this point (I’ve made quite a bit of progress on the website since this point) talks through a lot of this:
Website frontend
I decided to made the FE in React with pure JavaScript. Generally I’d prefer to use Angular because I have some history with it on other hobby projects and because I like that it has more of an opinion on how things should be done, but I wanted to use React as I haven’t before and I wanted to learn a bit about it.
There isn’t actually a lot to say here, the website is pretty simple really, but